Skip to Main Content
Back to Navigation

DIY Rain Barrel Installation and Rainwater Collection

Tan rain barrel connected to a gray downspout for water collection.

Anyone who has ever lived through water rationing has looked to their downspouts during a storm. If only you could save some of that precious rain for later! The good news is you can save water through DIY rain barrel installation and use.

How do you install a rain barrel (or, realistically, as many rain barrels as you have downspouts)? It’s easy! With this DIY rain barrel installation guide, you’ll be able to start collecting rainwater before the next cloudburst hits.

How to Collect Rainwater

A tan rain barrel placed on a back patio sitting on a brick stand collected to a downspout

Rain barrels are containers specially designed to capture and store rainwater. Typically, rain barrel capacity runs between 50 and 80 gallons. These containers are affordable and easy to find, with a wide selection available.

Most rain barrels feature a spout or hose connection, allowing you to use the water supply to water your yard and garden beds. So how much water does a rain barrel save? Well, depending on the annual rainfall of your area, you may save up to 1,300 gallons of water per barrel during the warmer months of the year.

Are you wondering how much money you can save with a rain barrel? Calculate your water bill savings against 1,300 gallons saved. You can quickly see how much money a rain barrel can help you hang onto. Best of all, rain barrels are easy to install yourself—follow the DIY rain barrel installation guide below to start saving on each rainy day!

How long will it take to install a rain barrel?

A woman wearing blue patchwork coveralls, white work gloves and a tool belt holding a windup red clock in between her hands

Installing a rain barrel is a relatively easy project, especially if you buy a well-made barrel. You can make a base from brick or cinderblock in a matter of just a few minutes. Altering the downspout is a fast process as well. All in all, you can have a rain barrel up and ready to collect rain in about an hour.

It may take a little longer if you want to build a base from stone or lay a concrete platform. You can also add landscaping around the rain barrel to hide and blend it into your garden. Like most DIY yard projects, the amount of time varies, depending on the details. For a basic setup, beginners should plan on around an hour from start to finish.

Tools Needed for Rain Barrel Installation

Before you start your DIY rain barrel installation, gather all the tools and supplies needed to properly set up your rain collecting station.

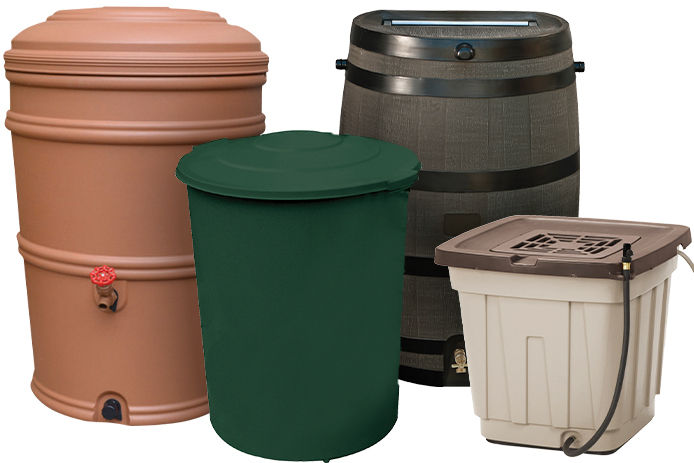
  • A quality rain barrel (50 gallons is usually the best choice)
  • Materials for your base (bricks, cinderblock, flagstone, or another durable material)
  • Paver base, if using pavers, stones, brick, flagstone, or patio block
  • A garden hose
  • Handsaw or tin snips
  • Protective work gloves

Because your rain barrel will be holding water, it's best to select a base material that offers some drainage. Pavers, flagstones, cinderblocks, and other water-friendly materials are a better choice than a wooden platform. You'll also want to avoid putting the rain barrel directly on your deck or porch to prevent wood rot from moisture accumulation beneath the barrel.

How to Install a Rain Barrel in 7 Easy Steps

Once you’ve gathered your materials, it’s time to get to work on your DIY rain barrel installation. Follow these simple step-by-step instructions to learn how to install a rain barrel to help conserve water (and save money while you're at it).

Step 1: Choose the Location for your Rain Barrel

There are a few considerations when you select your rain barrel location. First, you'll need to install a rain barrel close to a downspout (as the water needs to run directly into the barrel).

Look for a spot that's level. It should be slightly elevated, and water should run away from your home's foundation. You'll also want to choose a location where you can realistically reach your garden with the attached hose. Alternatively, you could also use a watering can with your rain barrel.

Step 2: Prepare the Area for Your DIY Rain Barrel Installation

Next, you'll need to prepare the spot to house your rain barrel. Ensure the ground is level and flat before placing the materials for your base. The base will further elevate the area, so it's important to have a nice spot to build.

Step 3: Construct the Base for Your Rain Barrel

A stack of gray bricks sitting in a green lawn

Next, you’ll want to put down a base for your rain barrel. Construct the base from your material of choice but be sure to use something that's moisture-friendly, offering drainage. Pavers, flagstones, and other bricks are typically a good choice.

Do a little research if you need inspiration from what others have done. If you're not a huge fan of cinderblock or brick, you can build a base with those materials but conceal it using wooden planks or other materials that match your landscape.

Consider planting a water-loving perennial or herb near the base of your rain barrel. Not only do plants make excellent camouflage, but they will thrive in the damp spot.

No matter how you construct your base, don’t skip it! The elevation from the bottom of the barrel helps gravity to deliver the water via the hose to your lawn and garden beds.

Step 4: Position the Rain Barrel

Once your base is secure, it's time to place your rain barrel. Position the barrel on the platform or base of bricks. Measure the height of your barrel and the height of the base where you plan to place it. Use this measurement to calculate the downspout length to reach the barrel's top.

Water falls from the downspout through a hole in the top of the barrel where it collects. Mark the spot on your downspout and prepare to cut it to fit the rain barrel.

Cut the Downspout

a man wearing a light blue long sleeve shirt holding a pair of tin snips cutting a piece of downspout

Once you’ve measured exactly where your rain barrel should sit, mark and cut the downspout using your hand saw or tin snips. Be sure to wear gloves when cutting the metal to protect your hands.

It's wise to err on the longer side when cutting the downspout. Remember that you can always cut it a little more if necessary. Consider attaching a flexible elbow to your downspout to better direct water to the rain barrel.

Step 6: Place the Rain Barrel

Wooden rain barrel sitting on a stack of brown and red bricks with a hose extention on the bottom spigot

Now it's time to place your rain barrel. Ensure that the downspout is directly above the inlet opening. If the downspout is too long, cut off a little more so it sits directly over the rain barrel screen. Take a step back to assess that the barrel is level and correctly placed. It should rest solidly on the base, with the downspout draining right into the top.

Step 7: Attach the Hose to Your Rain Barrel

Now your DIY rain barrel installation is almost complete! It’s time to attach your hose. Be sure to shut the valve on your rain barrel. Now all you need to do is hunker down and wait for the next storm, and voila! You should have enough rainwater to supply your garden for at least a few weeks.

You’ll also notice that most rain barrels come with an overflow hose near the top that extends from the side of the barrel. If you wish to make the most of your rain collection, you can place a second rain barrel near the first to catch the excess water overflow during a heavy rain event. Be sure to place the first barrel on a slightly higher base than the second to make the most of gravity.

Enjoy the Benefits of Collecting Rainwater in Your Rain Barrel

While rain barrels are an ideal way to save money on your water bill, there's another excellent reason to collect rainwater—plants love it!

Rainwater is the exact pH that plants in your garden want. Unlike tap water, which may contain chlorine, fluoride, and other minerals and elements that affect pH, the water from clouds is perfect for your garden. In some ways, your own rain barrel system is like a candy jar for your landscape! If you install a high-quality water collection system, you'll enjoy water bill savings and beautiful, pampered plants for years to come!

Rainwater is the exact pH that plants in your garden want. Unlike tap water, which may contain chlorine, fluoride, and other minerals and elements that affect pH, the water from clouds is perfect for your garden. In some ways, your rain barrel is like a candy jar for your landscape! If you install a high-quality water collection system, you'll enjoy water bill savings and beautiful, pampered plants for years to come!

Read next


Article Author

Francesca Singer

Francesca Singer is a DIY enthusiast with a master’s degree in landscape architecture. She splits her time between Texas and rural France. When not writing or wrangling a toddler, she can be found hiking or working in the garden.